
Mastering Audio in Adobe After Effects: A Comprehensive Workflow Guide for Motion Designers

While Adobe After Effects is primarily heralded as the industry standard for motion graphics, visual effects, and compositing, its relationship with audio is often misunderstood. Many motion designers view the software strictly as a visual medium, neglecting the robust, albeit hidden, tools available for sound integration. Mastering these tools is not merely about syncing a soundtrack; it is about elevating the production value of your motion design through precision, timing, and dynamic audio-driven animation.
The Main Facts: Why Audio Matters in After Effects
In the professional landscape, the marriage of sound and vision is what separates amateur work from high-end commercial content. Whether you are creating a kinetic typography piece, a complex product reveal, or a cinematic title sequence, the audio serves as the pulse of your project.
After Effects provides a surprisingly sophisticated suite of tools to manage sound. From the basic Audio and Preview panels to advanced keyframe automation, the software allows for granular control over how sound interacts with visual elements. While it is rarely a substitute for a dedicated Digital Audio Workstation (DAW) like Adobe Audition, After Effects is a powerful environment for syncing animations to beats, managing sound effects, and conducting preliminary sound design.

Chronology of Audio Integration: From Import to Final Mix
Understanding the timeline of audio management within the software is essential for an efficient workflow.
1. Preparation and Import
The process begins with importing your audio files—typically WAV or AIFF for high-fidelity needs—into your project bin. Once imported, audio files behave similarly to visual layers. They can be dragged into a composition, trimmed, and moved along the timeline.
2. The Setup: Panels and Preferences
Before beginning, you must ensure your workspace is configured for audio.
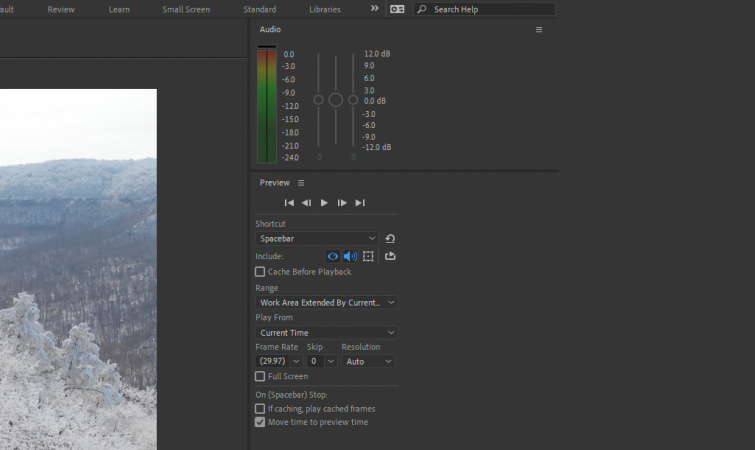
- The Audio Panel: Accessible via Window > Audio, this is your primary monitoring station. It provides a visual representation of your output levels, allowing you to ensure your mix isn’t peaking or clipping during preview.
- The Preview Panel: Located under Window > Preview, this panel is critical for managing how your computer handles playback. To hear audio during a standard spacebar preview, ensure the "Audio" icon is enabled within the Preview settings.
3. The Editing Phase: Waveforms and Sync
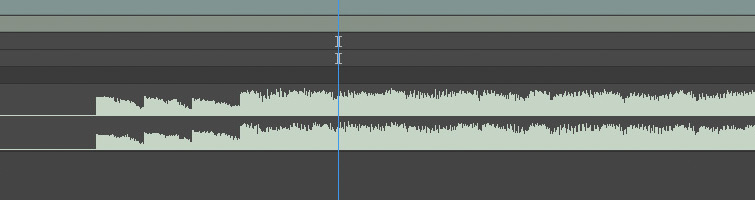
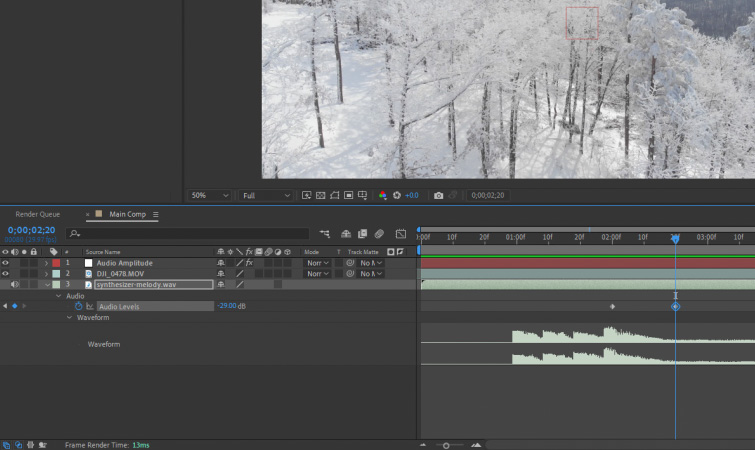
Once the audio is in the timeline, your focus shifts to the waveform. By selecting an audio layer and pressing the "L" key twice, you reveal the waveform. This is your visual roadmap. Experienced editors know that relying on your ears alone can be deceptive due to playback latency in the After Effects preview engine. By visually identifying the peaks in the waveform, you can set your keyframes or cut your visuals with frame-accurate precision, ensuring the "hit" of a motion matches the "hit" of the beat.
Supporting Data: Efficiency Through Shortcuts
Time is the most valuable resource in any post-production studio. Relying on mouse-heavy workflows will inevitably slow down your output. To optimize your audio workflow, professionals rely on these specific keyboard shortcuts:
- The Spacebar (Preview): The standard trigger for real-time playback. Always verify that audio is enabled in the Preview panel to avoid silent previews.
- The Numeric Keypad "0" (RAM Preview): This is the gold standard for high-performance viewing. It forces the software to render both audio and video into your RAM, providing a lag-free playback that accurately represents the final rendered output.
- The Numeric Keypad "." (Audio-Only Preview): This is an underutilized gem. When you need to focus entirely on the rhythm or pacing without the distraction of visual rendering, the "." key provides a clean, fast audio-only scrub.
Official Responses and Best Practices: The "External DAW" Debate
Adobe’s official documentation acknowledges that After Effects is not a comprehensive audio mixer. While you can perform basic tasks like adjusting volume, panning, and simple equalization, the software lacks the deep-mixing capabilities of Premiere Pro or Adobe Audition.
Industry experts and Adobe trainers generally suggest a "Pipeline Approach." The consensus is to perform your heavy audio mixing, noise reduction, and sound design in a DAW, and then export the finalized "mixdown" to After Effects for the final sync. Attempting to master a complex soundscape within the After Effects timeline often leads to system bloat and performance degradation. Use After Effects for what it does best: keyframing the audio to visual elements, not for sound engineering.
Implications: The Power of Data-Driven Animation
One of the most profound implications of learning audio in After Effects is the ability to automate animation through "Convert Audio to Keyframes." This feature transforms the amplitude of your audio file into numerical data.
Converting Audio to Keyframes: A Deep Dive
By right-clicking your audio layer and selecting Keyframe Assistant > Convert Audio to Keyframes, After Effects generates a "Null Object" layer containing expression-ready data. This Null Object contains three sliders:
- Left Channel: Amplitude data for the left stereo signal.
- Right Channel: Amplitude data for the right stereo signal.
- Both Channels: The combined average.
Once this data exists, you can use the "Pick Whip" to link the scale, rotation, or opacity of any graphic element to these keyframes. Suddenly, your shapes are pulsing, vibrating, and jumping in perfect synchronization with the music. This creates a high-production value look that would take hours to animate manually.
Advanced Techniques: Beyond the Basics
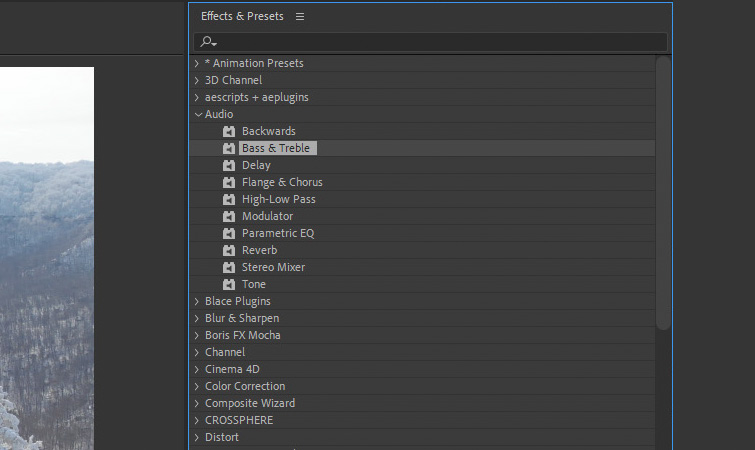
While the fundamental tools are useful, the advanced user looks to the Effects menu. Under Effects > Audio, you have access to tools like Bass & Treble for tonal shaping, Reverb for creating spatial depth, and the Stereo Mixer for balance adjustments.
However, the real power lies in the Graph Editor. When you have converted your audio to keyframes, the Graph Editor allows you to see the intensity of your audio as a visual curve. You can use this to smooth out transitions, create easing, or manipulate the sensitivity of your audio-driven animations, ensuring the motion feels organic rather than mechanical.
Conclusion: Elevating Your Motion Craft
Audio in After Effects is often treated as an afterthought, but for the discerning motion designer, it is an essential pillar of visual storytelling. By mastering the basic panels, leveraging keyboard shortcuts to maintain a high-speed workflow, and utilizing the "Convert Audio to Keyframes" feature, you can bridge the gap between static motion graphics and immersive, rhythmic design.
Remember, the goal is not to turn After Effects into a recording studio, but to use it as a sophisticated bridge that allows sound and vision to coexist in perfect harmony. As you continue to refine your skills, always keep an eye on the waveform, trust your data-driven keyframes, and never underestimate the impact of a perfectly timed sound effect on your final edit. Whether you are building a commercial trailer or a social media clip, the marriage of audio and visual data is the key to creating a truly memorable audience experience.
