
Taking Back Control of the Timeline: How to Stop Adobe Premiere Pro from Automatically Adding Tracks
By ProVideo Coalition Staff
Published as part of the Tool Tip Tuesday for Adobe Premiere series, courtesy of Adobe.
Main Facts
For professional video editors, few things are more disruptive than non-linear editing (NLE) software making unprompted decisions during the assembly process. Among the myriad preferences tucked away inside Adobe Premiere Pro, one long-standing default behavior has quietly driven veteran editors mad for years: the automatic generation of new timeline tracks.
When dropping source media containing more video or audio channels than an active sequence possesses, Premiere Pro historically took the liberty of instantly expanding the timeline. It would append extra tracks to accommodate every incoming stream, whether the editor wanted them or not.
However, thanks to software updates introduced in version 26.3, Adobe has finally given editors the granular control they have long demanded. Users can now permanently disable this behavior. By toggling a single preference—“Add tracks automatically when editing source clips onto the Timeline”—editors can ensure that their meticulously organized project sequences remain untouched, preventing the software from spawning unwanted tracks without explicit permission.
Chronology: The Evolution of a Contested Feature
To understand why this update is being celebrated across post-production communities like Reddit’s r/editors, it helps to examine how the feature evolved and why it became such a point of friction.
The Push for Accessibility vs. Professional Control
Over the years, NLE developers have increasingly built features aimed at lowering the barrier to entry for novice users. The logic is understandable: software must feel approachable to beginners who expect drag-and-drop simplicity without steep learning curves. If a new user drops a multi-track clip onto a timeline and audio channels go missing, they often assume the software is broken rather than realizing their sequence lacked enough tracks to support the file.
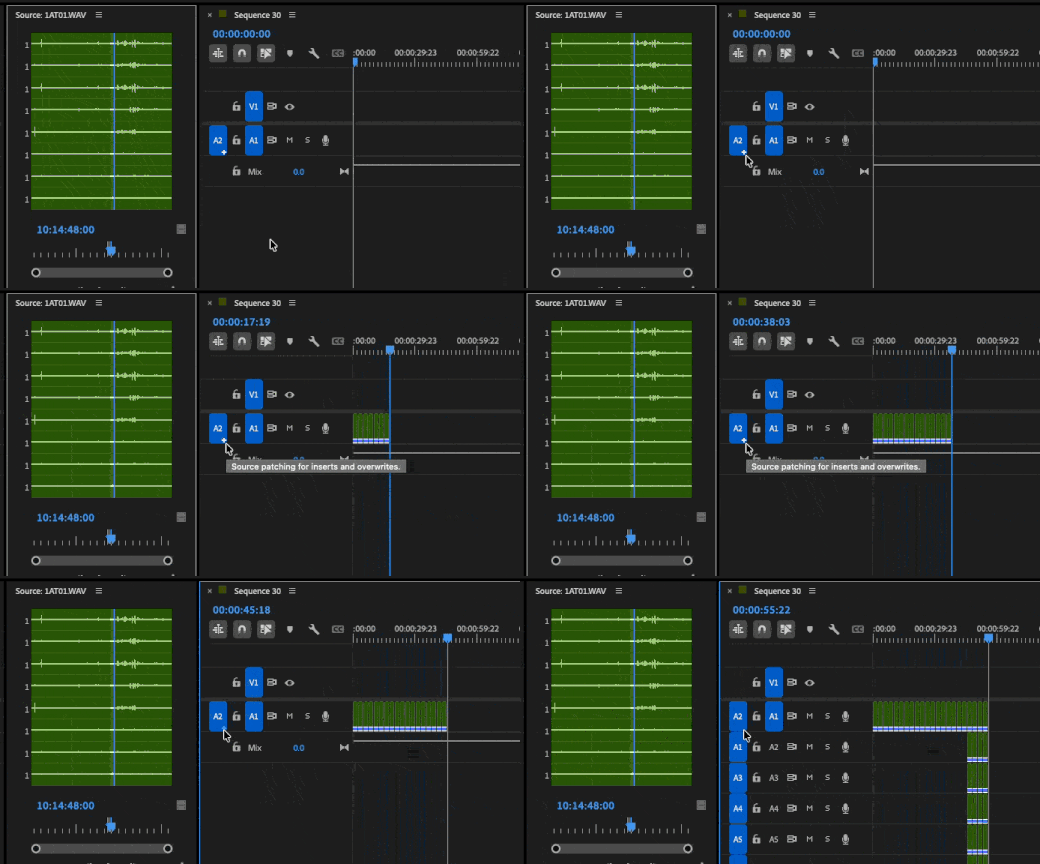
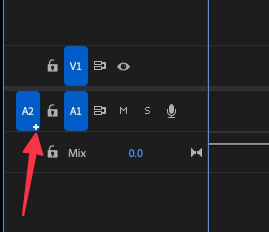
To solve this for beginners, Adobe implemented the auto-adding track behavior. When loading a source with, for instance, eight audio tracks into a timeline with only stereo tracks, a small plus icon would appear on the source side. The software would automatically provision the necessary tracks to ingest the raw media in its entirety.
The Veteran Editors’ Frustration
While this automated assistance helps absolute beginners, it frustrates experienced professionals. Editors working on complex, multi-cam, or documentary projects often ingest raw clips containing massive channel counts—sometimes field recorders capturing 32 distinct audio tracks simultaneously.
In a professional environment, sequences are built with rigid structural discipline. Dialogue, sound effects, music, and scratch tracks are mapped to specific, designated tracks according to delivery specifications or post-production house standards. Having an NLE arbitrarily inject extra tracks disrupts this workflow, forcing editors to constantly clean up, delete, or reorganize messy timelines.
The Turning Point: Version 26.3
The tide began to turn earlier this year. In March, prominent post-production writer and editor Scott Simmons published a scathing critique on the ProVideo Coalition titled, “Adobe finally fixes my single most hated feature in Adobe Premiere Pro (Beta).” Simmons highlighted a sentiment echoed by countless professionals across the industry: "What we don’t want is the NLE doing things without our permission."
By June, with the release of version 26.3, Adobe rolled out the official setting allowing users to disable the feature entirely. This bridged the gap between beginner-friendly defaults and professional-grade customization.
Supporting Data and Workflow Analysis
To fully appreciate the impact of this update, one must look at how modern production workflows handle complex multi-channel audio and video assets.
In contemporary filmmaking, capture devices routinely record far more data than a standard timeline requires. A typical documentary shoot might involve:
- A video track with a primary camera feed.
- Up to 32 discrete audio channels capturing boom mics, lavaliers, ambient room tone, and direct-board feeds.
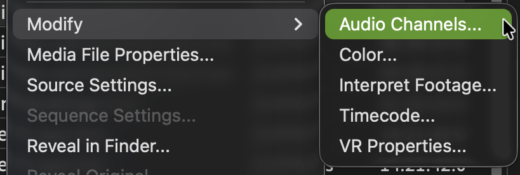
Before version 26.3, dropping a 32-track file onto a standard 4-track timeline meant Premiere Pro would attempt to reconcile the mismatch by dynamically expanding the project workspace. Editors quickly developed workarounds to mitigate the clutter. The most common method involved navigating to Modify > Audio Channels in the project panel prior to editing the clip onto the timeline, manually disabling unused tracks to prevent them from entering the sequence.
Alternatively, editors relied on traditional three-point editing and audio patching—mapping specific source channels directly to pre-determined destination tracks. However, if an editor forgot to modify the clip properties beforehand, or if they relied on rapid drag-and-drop methods, the auto-track feature would override their manual intent.
With the auto-add feature disabled, the software still displays the familiar source-side plus icon, signaling that extra channels are available. However, it now leaves the final decision entirely up to the editor. Whether using drag-and-drop or three-point editing, the timeline remains static unless the user explicitly chooses to click the plus icon and expand the sequence.
Step-by-Step Guide: How to Turn Off Auto-Adding Tracks
Despite the rollout of this crucial update, many experienced editors remain unaware that the feature can be toggled off, largely because they have spent years developing muscle memory to work around it.
To take back full control of your timeline architecture, follow these simple steps:
- Access Preferences:
- macOS: Navigate to
Premiere Pro>Settings>Timeline. - Windows: Navigate to
Edit>Preferences>Timeline.
- macOS: Navigate to
- Locate the Setting: Scroll through the Timeline preferences panel to find the checkbox labeled:
- "Add tracks automatically when editing source clips onto the Timeline."
- Disable the Feature: Uncheck the box and click OK to save your preferences.
Once disabled, test the change by importing a multi-track source file into a leaner sequence. Notice how the software respects your sequence boundaries, giving you absolute authority over when—and where—new tracks are created.
Official Responses and Industry Implications
The introduction of this preference toggle highlights a broader philosophical shift in software development for creative industries: the move toward customizable automation rather than forced-upon-you AI and convenience features.

In an era where software developers across all sectors are increasingly integrating automated features that operate behind the scenes—often asking for user permission "left and right" or making unilateral design choices—Adobe’s decision to offer an explicit opt-out for timeline manipulation has been warmly received.
Industry analysts note that while software accessibility remains a core metric for tech giants, alienating power users carries a heavy cost in professional circles where speed, precision, and predictability are paramount. By acknowledging that professional editors require absolute determinism from their toolsets, Adobe has reinforced Premiere Pro’s standing in high-end post-production environments.
Final Thoughts for Editors
If you have ever experienced the frustration of opening a sequence only to find mysterious new tracks cluttering your workspace, understand that it was never a glitch—it was simply the default behavior of the software at work.
Now that the power to disable this feature rests entirely in your hands, take a few minutes to update your preferences, test out the new workflow, and reclaim absolute mastery over your timeline.
