
Mastering Audio: A Comprehensive Guide to Sound Design in Adobe After Effects
While Adobe After Effects is primarily celebrated as the industry-standard powerhouse for motion graphics, visual effects, and compositing, its relationship with audio remains a subject of frequent debate among professional editors. It is rarely the first software a sound designer chooses for a mix, yet it is an indispensable environment for animators who need their visuals to react, pulse, and dance to the rhythm of a soundtrack.
Whether you are syncing a logo reveal to a drum beat or layering immersive soundscapes for a film trailer, understanding how to manage audio within the After Effects ecosystem is a fundamental skill. This guide explores the essential techniques, workflows, and advanced tips for mastering sound in a motion-centric environment.
The Core Fundamentals: Navigating the Audio Environment
When you import an audio file into After Effects, it arrives as a static asset in your timeline. Unlike dedicated Digital Audio Workstations (DAWs) like Adobe Audition or Avid Pro Tools, After Effects treats audio as a supplementary element. To effectively manage these files, you must first become comfortable with the software’s interface-specific panels.
Essential Audio Panels
Two primary windows are critical for monitoring and controlling your sound:

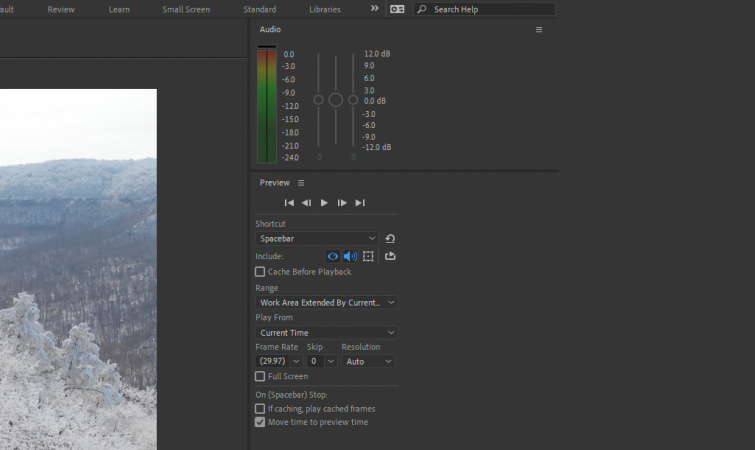
- The Audio Panel (Window > Audio): This serves as your primary meter. It displays real-time sound levels during composition playback. While it does not provide deep mixing capabilities, it is essential for identifying potential clipping—where your audio exceeds the 0dB threshold—allowing you to adjust playback levels accordingly.
- The Preview Panel (Window > Preview): This is the command center for your playback experience. It allows you to toggle audio on or off during preview. A common mistake among beginners is attempting to troubleshoot "silent" compositions without realizing that audio previewing has been disabled in this panel.
Keyboard Shortcuts: The Professional Workflow
Efficiency in After Effects is dictated by your mastery of the keyboard. For audio-heavy projects, commit these shortcuts to memory:
- Spacebar: Performs a standard composition preview (ensure audio is toggled on in the Preview panel).
- Numpad 0: Executes a RAM Preview. This is the only way to hear audio playback in real-time, as it caches the frames and the audio buffer into your system’s RAM.
- Numpad Decimal (.): The "Audio Only" preview. This is an invaluable tool for listening to your soundtrack without the processing overhead of rendering video frames.
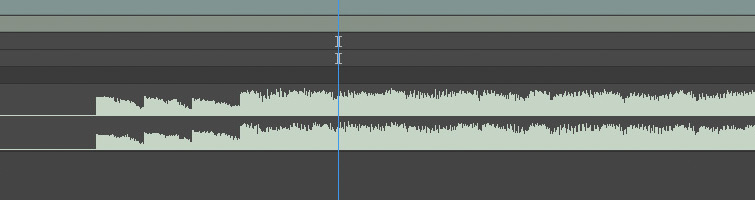
- The "L" Key (Double Press): By selecting your audio layer and tapping the "L" key twice, you instantly expand the layer to reveal the Waveform. This visual representation is the bedrock of precise timing and beat-matching.
Chronology of an Audio Workflow
To achieve professional results, one should follow a logical sequence when incorporating sound into a motion graphics project.
Phase 1: Import and Preparation
Always ensure your audio assets are high-quality (WAV or AIFF files are preferred over compressed MP3s to avoid latency issues). Once imported into your project bin, drag the file onto the timeline. Immediately toggle the layer down to reveal the waveform.
Phase 2: Visualizing the Beat
As noted in professional practice, never rely solely on your ears for timing. Audio playback in After Effects is prone to a slight "sync drift" or latency, especially in complex compositions. Instead, use the waveform to identify the peaks—the transient spikes in the audio—which represent the heavy drum hits or distinct rhythmic changes. Aligning your keyframes with these visual markers ensures pixel-perfect sync.
Phase 3: Mixing and Fading
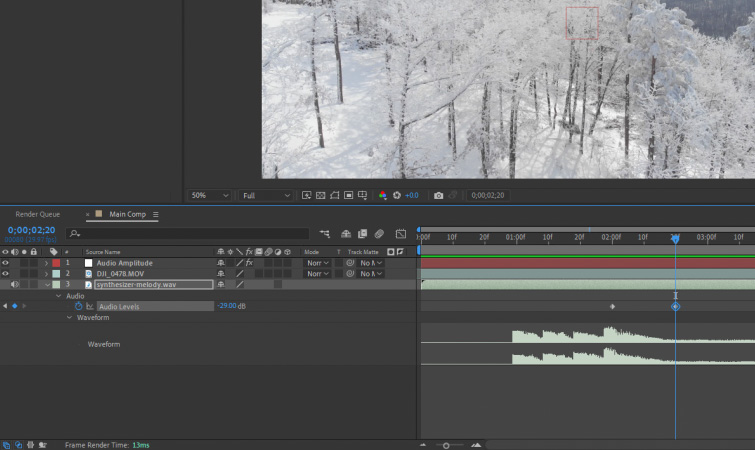
Click the Speaker Icon to the left of the layer to mute or unmute. To introduce a natural fade, reveal the Audio Levels property by pressing "L" twice. Place a keyframe at the start of your fade, move forward in the timeline, and adjust the decibel level. The waveform will dynamically resize to reflect these changes, providing instant visual feedback.
Supporting Data: When to Use After Effects vs. External Tools
It is a common industry question: "Why should I use After Effects for audio at all?"
The answer lies in the distinction between Mixing and Driven Animation.
- When to use After Effects: Use it for "Audio-Driven Animation." If your goal is to have a visual element (like a circle or a light flare) react to a bass hit or a vocal spike, After Effects is the superior choice.
- When to use Adobe Audition or Premiere Pro: If your task involves noise reduction, multi-track mixing, compression, equalization, or mastering a final soundtrack, After Effects is insufficient. The software lacks the professional-grade signal processing required for broadcast-quality audio mixing.
In short, use After Effects for rhythmic alignment and Audition for sonics.
Implications of "Convert Audio to Keyframes"
Perhaps the most powerful feature in the After Effects audio toolkit is the "Convert Audio to Keyframes" function. This process bridges the gap between sound and motion by turning the energy of an audio track into numerical data.
How it Works
- Right-click your audio layer in the composition.
- Navigate to Keyframe Assistant > Convert Audio to Keyframes.
- After Effects generates a Null Object layer named "Audio Amplitude."
This Null object contains three separate channels: Left, Right, and Both. These channels contain keyframes that fluctuate in value based on the volume and frequency of the audio at any given frame. By using the Pick Whip tool to link the "Slider" property of the Audio Amplitude layer to the "Scale," "Opacity," or "Rotation" of your visual elements, your animation will automatically react to the music.
The implications for this are immense. It allows for procedural animations that would take hours to animate by hand. By opening the Graph Editor, you can further smooth out or amplify these values, giving you total control over how "hard" or "soft" the reaction to the music is.
Official Perspective and Best Practices
Industry professionals often emphasize that the "hidden" nature of audio in After Effects is a design choice. Adobe keeps the audio engine lightweight to prioritize the rendering of complex visual data.
For those looking to elevate their projects, the following best practices are recommended:
- Normalize Your Audio: Before bringing files into After Effects, ensure they are normalized in a dedicated audio editor. This prevents inconsistent volume levels that require excessive keyframing.
- Use High-Quality Assets: Avoid low-bitrate files. High-resolution audio makes the waveform easier to read, which directly leads to more accurate animation.
- The "Double-L" Habit: Always use the waveform. Even if the project seems simple, working by eye rather than by ear is the hallmark of a professional motion designer.
Final Thoughts: The Synergy of Sound and Motion
Audio is the invisible thread that binds a motion graphic piece together. Without proper sound design, even the most stunning visual animation can feel hollow or disconnected. By utilizing the built-in panels, respecting the limitations of the software, and leveraging the power of "Convert Audio to Keyframes," you can create immersive, reactive, and rhythmic motion design that resonates with your audience on both a visual and auditory level.
As you continue to refine your skills, remember that sound is not merely an afterthought to be added at the end of the production. It is a creative driver that should inform the pacing, energy, and emotional impact of your work from the very first frame.
