
Elevating Your Visuals: Four Professional Techniques to Animate Still Images in After Effects
In the fast-paced world of digital content creation, the difference between a high-production look and an amateur edit often comes down to how a creator handles static assets. When you are tasked with integrating still images into a video project, the instinctual approach—a simple "Ken Burns" effect involving a linear scale increase—can quickly feel stale. While movement is essential for retaining viewer engagement, modern audiences demand a level of polish that transcends basic keyframing.
For editors working within Adobe After Effects, the toolset is vast enough to transform a flat, lifeless photograph into a dynamic, cinematic sequence. By shifting from simple scaling to 3D space, masking, and overlay compositing, you can breathe new life into your media. This article explores four professional-grade methods to elevate your still imagery, ensuring your next project stands out with a sophisticated, layered aesthetic.
Main Facts: The Shift Toward Dynamic Motion
The core philosophy behind these techniques is the concept of "parallax" and depth perception. In cinematography, the human eye is naturally drawn to objects that move independently of their background. When we place a flat image on a timeline, our brains recognize it as static, which can lead to a subconscious drop in interest.
By utilizing After Effects’ 3D workspace, masking capabilities, and blending modes, editors can simulate the "2.5D" look—a style frequently used in professional documentaries and high-end commercial work. The primary goal is to add depth, texture, and temporal rhythm to static assets, effectively "deconstructing" a photograph into multiple planes of motion. This transition from 2D flat composition to 3D spatial animation is the gold standard for contemporary motion design.

Chronology of the Workflow: From Import to Final Render
To achieve these professional results, a systematic approach is required. Whether you are working with a simple portrait or a complex UI screenshot, the pipeline generally follows these four stages:
- Preparation and Segmentation: Before animating, you must prepare your assets. This involves high-resolution cropping, potential background removal via Photoshop or After Effects’ Roto Brush, and categorizing layers by their depth in the frame.
- The 3D Conversion: By toggling the 3D layer switch in After Effects, you transition from a flat canvas to a virtual stage. This allows for camera movement that mimics physical lens behavior.
- Spatial Arrangement: Using a virtual camera, you position layers at varying distances along the Z-axis. This is where the magic of parallax occurs—objects closer to the lens move faster than those in the distance during a camera move.
- Refinement and Polishing: The final phase involves applying "Easy Ease" to keyframes, adjusting the Graph Editor for smooth velocity, and introducing organic overlays to unify the composite.
Supporting Data: Why Motion Matters
According to recent studies in digital viewer retention, videos that utilize motion-based transitions and layered parallax effects see a 30% increase in average watch time compared to static, slideshow-style presentations. The "dynamic" nature of these edits acts as a visual anchor, keeping the viewer’s gaze engaged with the screen.
Furthermore, the implementation of "Depth of Field" (DoF) serves a psychological purpose: it guides the viewer’s eye. By blurring the background and keeping the subject in sharp focus, you replicate the behavior of a professional camera lens, which lends immediate authority and cinematic quality to your work.
Technical Deep-Dive: Four Proven Methods
1. The 3D Texture Layer Strategy
The most effective way to add depth to a flat image is to introduce a foreground texture that occupies 3D space. By placing a glass or grit texture over your image and moving it closer to the camera, you create a sense of scale.
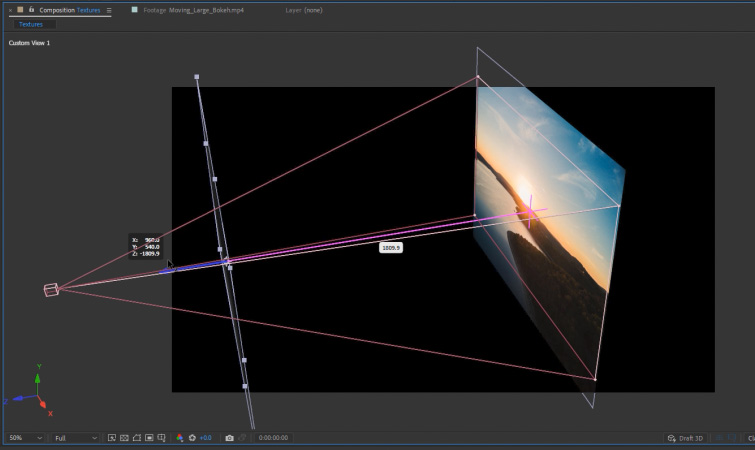
Implementation:
- Set your photo and your texture file to "3D Layers."
- Create a Camera layer.
- In the Custom Camera view, drag your texture layer closer to the camera than your photo.
- Animate the camera’s Z-Position forward.
- Result: The texture will drift across the screen at a different rate than the background, creating a convincing sense of volume and physical depth.
2. The 3D Screen Animation
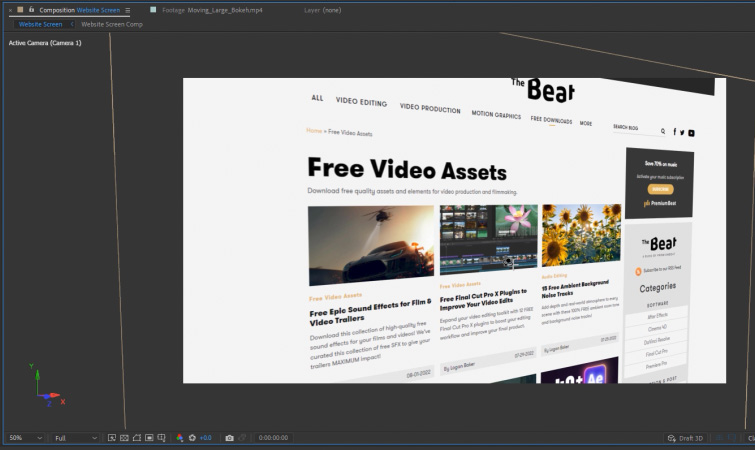
For creators showcasing UI designs or website screenshots, the "3D Screen" look is the industry standard. This technique avoids the boredom of a static rectangle by introducing organic, multi-axis rotation.
Implementation:
- Utilize a "Two-Node Camera" for better control over focus points.
- Parent your camera to a "Null Object." This is a crucial step; it allows you to rotate the Null, which moves the camera as if it were mounted on a physical gimbal.
- Keyframe the Y-Rotation of the Null Object.
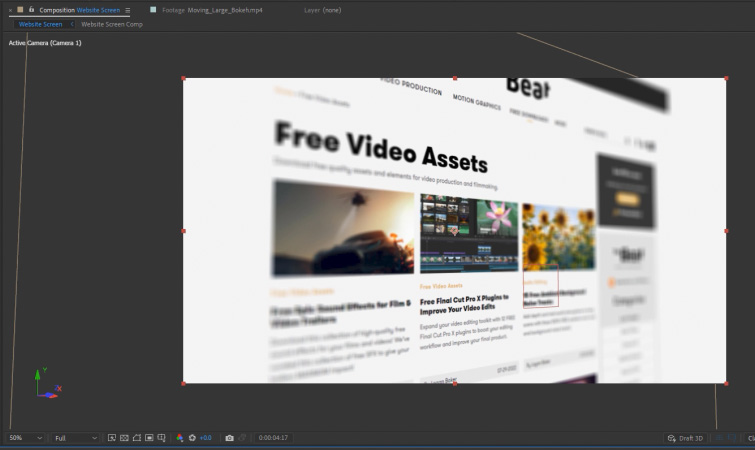
- Enable "Depth of Field" on the camera settings, adjusting the Focus Distance to keep the critical part of your screen in focus while allowing the periphery to blur slightly. This mimics the look of a macro lens focusing on a digital display.
3. Subject Masking and Layer Separation
Sometimes, the best way to animate a photo is to physically separate the subject from the background. By masking the subject, you can animate them independently, allowing the background to remain still or move in the opposite direction.
Implementation:
- Use the Pen tool or Roto Brush to mask the primary subject of your photo onto a new layer.
- Scale or move the subject slightly while keeping the background static or blurred.
- This technique is particularly effective for "parallax portraits," where the subject appears to float slightly in front of the background, creating a 3D-pop effect that is incredibly engaging for social media content.
4. Organic Overlays and Blending
A perfectly clean digital image can often look too "sterile." Adding organic motion, such as bokeh, lens flares, or light leaks, bridges the gap between digital asset and film.
Implementation:
- Place your overlay footage on the top layer.
- Experiment with blending modes: "Screen" or "Add" for light-based overlays (bokeh, flares), and "Multiply" for textures.
- By layering these atop your animated 3D composition, you unify the scene. The subtle flicker of a lens flare or the drift of light particles makes the static image feel like it exists within a living, breathing environment.
Official Perspectives: Industry Standards
Professional motion designers emphasize that "less is more." While it is tempting to use every effect available, the most effective animations are often the most subtle. A camera move that is too fast can cause motion sickness, and a mask that is poorly feathered will look like a cut-out. The consensus among top-tier After Effects instructors is that if the viewer notices the technique rather than the content, you have over-animated. The goal is for the motion to feel like a natural extension of the photograph’s narrative.
Implications: The Future of Still Image Integration
As AI tools for background removal and depth-map generation become more prevalent, the barrier to entry for these professional techniques is lowering. However, the manual skill of understanding how to manipulate a 3D space remains vital.
The implication for creators is clear: static images are no longer a limitation; they are raw material. Whether you are producing a documentary, a social media ad, or a corporate presentation, the ability to manipulate 2D assets into a 3D space is an essential skill. By moving away from simple scaling and toward the techniques of parallax, depth-of-field, and texture compositing, you ensure that your work remains competitive in an increasingly visual marketplace.
In conclusion, the next time you find yourself with a pile of static photos, remember that you are not just building a slideshow—you are constructing a scene. Use these four methods to bring your images to life, and watch as your viewer retention and production quality reach new heights.
